1. If you already use a Mikrotik router, save its configuration with Winbox and reset it.
2. Plug the internet cable from provider's router into the first port (ETH1) or insert microSIM card in LTE/5G router.
3. Turn on the router.
4. Connect your phone or tablet with ImProvider to WiFi network "MikroTik-*****" .
5. Check your Internet connection.
Troubleshooting
If there is no Internet:
Try to connect to another port of provider's router. Maybe you have selected the port for TV or phone.
Reset your MikroTik router. It has to be in default configuration.
Connect to provider's router by PC to check the wired Internet connection.
Call the provider and ask how his router works. MikroTik has to receive the Internet to the first Ethernet port with ip allocated by DHCP (tell it to your provider's support).
If you have problems with LTE/5G router, you might need to set APN (Access Point Name). Ask your mobile provider for this name and watch the video: https://www.youtube.com/watch?v=Kd-pq-WBNa8
ImProvider User Manual
First Setup
1. Start ImProvider.
2. Read the manual and press CONTINUE.
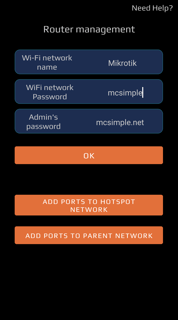
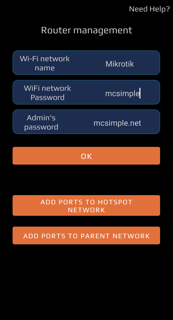
3. Press ROUTER MANAGEMENT.
Here you can configure Wi-Fi part of your parent network and admin's password. You can change any of these parameters. Enter the wireless network name without spaces, a wireless password can consist of 8 characters minimum also without spaces. We recommend using 8 characters or more for the admin's password. If you change the default configuration, you must always set your passwords by hand for security reasons. These fields can't be empty.
4. Press OK.
5. Reconnect to your new Wi-Fi network. If you haven't changed the password, use "mcsimple" in low case without quotes.
6. Check your internet connection.
7. Open the app, enter your new admin's password in the password field. You can save it by checking Save box.
Troubleshooting
If you can't connect to the router, check your device ip settings. The app connects to the address from the gateway section.
If there is no Internet after the first setup, try to reset your router and set it up again using this manual.
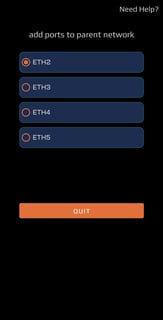
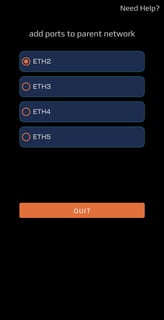
Add ports to parent network
In this section you can add several ports to the parent network to connect a printer, a TV or a Wi-Fi access point.
Wait until the app checks the condition, then select the ports. Right after that selected ports will be connected to your network and you can use them.
If you have something connected to one of these ports, reconnect it to start working properly.
When you open this window for the first time you will see the button "Create separate network on each port". After pressing it the app will do it. It will take some time so be patient, especially the owners of 24 port routers. If you see the notice "The app is not responding" wait until the app finishes its work.
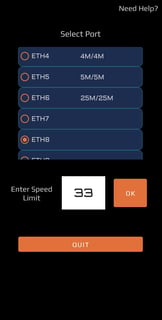
After that you can control the internet speed limit on each port. So when you press "Network Ports Management" after creating the networks, you will see the window for managing speed limits.
When this window opens, the app asks every port for its settings so you can see what speed limits have already been set. Wait until all the ports have been asked, select the port needed, enter the speed limit in megabits and press OK. Download and upload speed will be cut. On the selected port enter 0 to turn the Internet off, enter 999 to turn off the speed limit.
Troubleshooting
If the app can't identify the quantity of ports in your router, you will see the screen where you can set it by yourself. You can select 4, 5, 8, 10 or 24 ports.
Network Ports Management

Hotspot Management
When you open this window for the first time you will see the button "Create Hotspot Network". After pressing it you will see the screen where you can set a hotspot wireless name and the speed limit for every user.
Set what you want or leave it as it is and press OK. The app will create a new wireless network. After that make sure that you have reconnected to your parent network. When you press "Hotspot Management" next time, you will see the window for adding hotspot users. Hotspot username and password will be set automatically. You can change them if you want.
Select number of devices that can be connected using this ticket and the number of hours. You can set up to 10 devices and 999 hours. The time starts counting down from the moment of creating the ticket.
Press CREATE button and you will see the ticket that you can print if you want. Also you can disable and enable Hotspot wireless network on your router. To change the hotspot network name or speed limit press HOTSPOT NETWORK CONFIGURATION button.
Troubleshooting
If you have any problems, contact us and we will do our best to help you.
In Router Management section you can find two buttons:
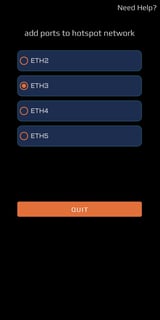
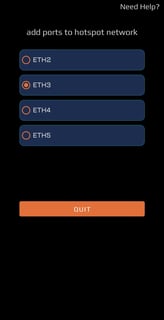
Add ports to Hotspot network
In this section you can add several ports to the hotspot network to connect Wi-Fi access points to increase range of your hotspot.
Wait until the app checks the condition, then select the ports. Right after that the selected ports will be connected and you can use them.
If you have something connected to one of these ports, reconnect it to start working properly. If you turn off the port, it will be in the parent network.
*If you have any questions or want to report an error, feel free to contact us.
Preparatory Stage